Aquesta és una revisió antiga del document
Ethical Hacker : sesión 4
clase
- Modulo 14
- Modulo 15
- Modulo 16
- Modulo 17
Modulo 14: Hacking Web Applications
- Amenazas
- OWASP - https://owasp.org
- asociación sin ánimo de lucro
- proyectos relacionados con seguridad
- Coraza - ModSecurity - set reglas programables
- web security testint guide
- Componentes de terceros con problemas: https://blog.elhacker.net/2022/06/herramienta-YODA-encuentra-miles-plugins-maliciosos-en-wordpress.html
- Falta de monitorización
- Ataques a aplicaciones web
- ataque transversal directorio
- https://certifiedhacker.com/<portales/
- se pueden escanear, permitido
- ejemplos de vulnerabildiades
- manipulación campos ocultos (via POST/GET)
- amazon:
&pct-off=60-99- Truco para añadir a la URL de amazon para ver los productos con un descuento dado.
- pass-the-cookie
- robar cookies para logearse en una web
- same-site
- command injection
- shell
- html
- file
- LDAP injection
- XSS en comentarios (tipo 2)
- evasión filtros XSS
- Timing attacks
- direct timing: deducir por la respuesta si el usuario existe o no
- cross-site timing: paquetes de solictud manipulados usando javascript
- browser-based timing: estimar el tiempo que tarda el server en procesar para saber si es correcto o no
- XXE
- invocación desde XML a una petición de fichero/recurso externo
- redirecciones / reenvios inválidos
- Magecart (web skimming): componentes de terceros desactualizados
- Watering Hole (abrevadero): espera de potenciales víctimas, emboscada
- CSRF
- Manipulación / envenenamiento de cookies
- Deserialización insegura
- Ataques a servicios web
- apuntes Fernando:
- SOAP (Simple Object Access Protocol) es un protocolo estándar que define cómo dos objetos en diferentes procesos pueden comunicarse entre si, preguntando a UDDI por su localización, y por medio de intercambio de datos XML (documentos WSDL).
- https://txikiboo.wordpress.com/2013/11/11/relacion-soap-wsdl-uddi/ - Artículo sobre SOAP
- UDDI son las siglas del catálogo de servicios denominado Universal Description, Discovery and Integration. UDDI se comunica intercambiando archivos WSDL. Un servidor (o proveedor del servicio) debe realizar el registro de su servicio en UDDI para que sea localizable.
- WSDL (Web Services Description Language), es un formato (XML) que se utiliza para describir servicios web (WS).
- XML Poisoning
- DNS Rebinding
- saltarse restricciones de seguridad
- controlar DNS secundario, bajar TTL
- primera petición legítima, la siguiente manipulada
- …
- burpsuite: megaherramienta de seguridad (también vale para ZAP)
- https://portswigger.net/burp - Descarga. Hay tres versiones:
- Burp Suite Community Edition (gratis): https://portswigger.net/burp/communitydownload
- Burp Suite Professional (349$ / año)
- Burp Suite Enterprise Edition (a partir de 6000$ / año)
- https://portswigger.net/web-security - Academy, formación gratuita, pero requiere cuenta.
- https://portswigger.net/web-security/all-labs - Labs gratuitos, aunque requieren tener cuenta.
- https://www.youtube.com/playlist?list=PL4TbrTdoQBY_dZQ9XI9NKwb5evvyfYQNQ - Un curso en video de Burp Suite, en español, que está bastante bien. Para novatos. Sacado de https://sniferl4bs.com/2020/06/curso-burp-suite-desde-0-presentaci%C3%B3n/
- https://github.com/alphaSeclab/awesome-burp-suite/blob/master/Readme_en.md - Recopilación de recursos de Burp Suite
Lab 1 Module 14: Footprint the Web Infrastructure
Task 1: Perform Web Application Reconnaissance using Nmap and Telnet
- Perform a Whois lookup to gather information about the IP address of the web server and the complete information about the domain such as its registration details, name servers, IP address, and location.
- Use tools such as Netcraft (https://www.netcraft.com), SmartWhois (https://www.tamos.com), WHOIS Lookup (https://whois.domaintools.com), and Batch IP Converter (http://www.sabsoft.com) to perform the Whois lookup.
- Perform DNS Interrogation to gather information about the DNS servers, DNS records, and types of servers used by the target organization. DNS zone data include DNS domain names, computer names, IP addresses, domain mail servers, service records, etc.
- Use tools such as, DNSRecon (https://github.com), and Domain Dossier (https://centralops.net) to perform DNS interrogation.
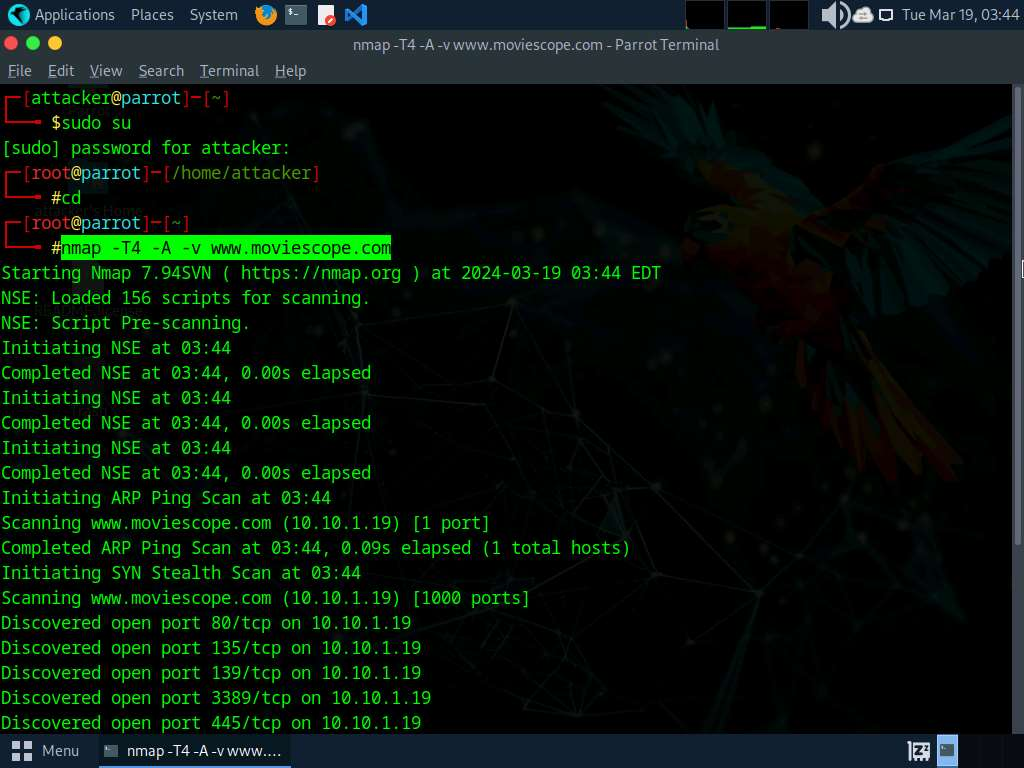
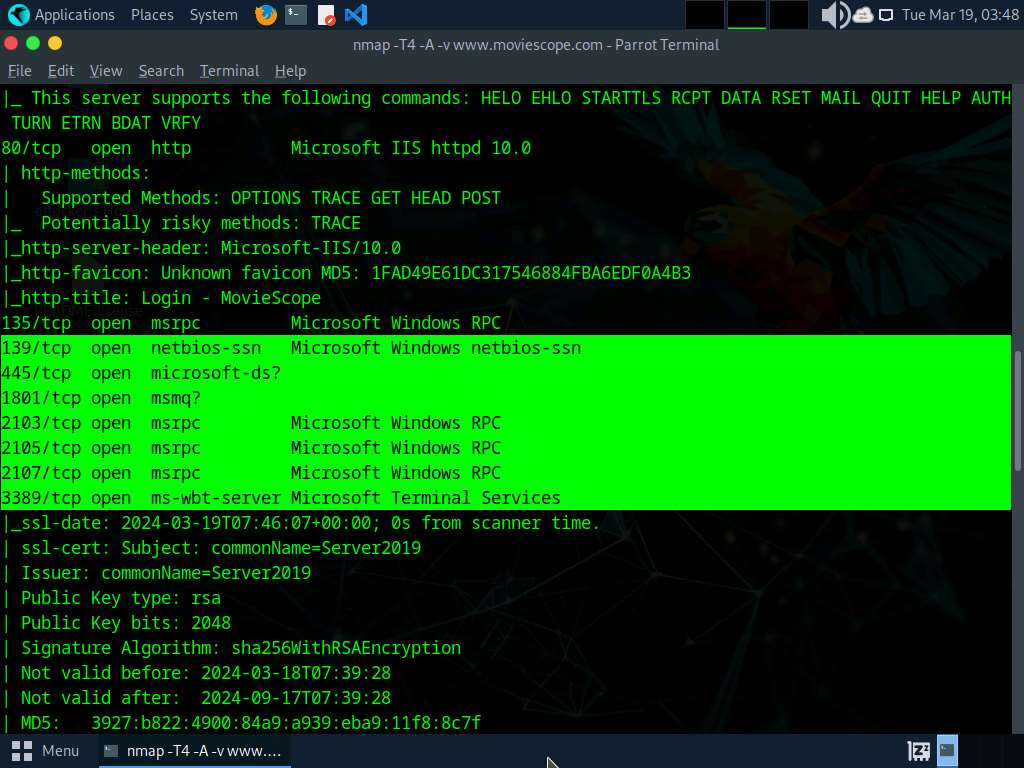
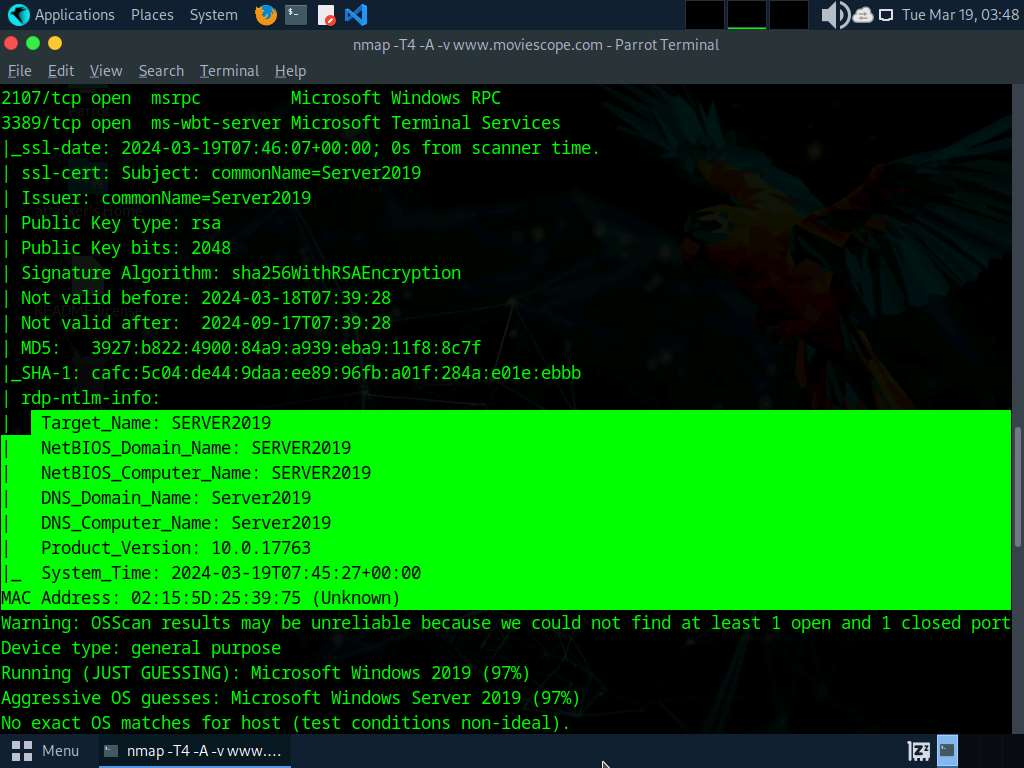
- In the Parrot Terminal window, run nmap -T4 -A -v [Target Web Application] command (here, the target web application is www.moviescope.com) to perform a port and service discovery scan.
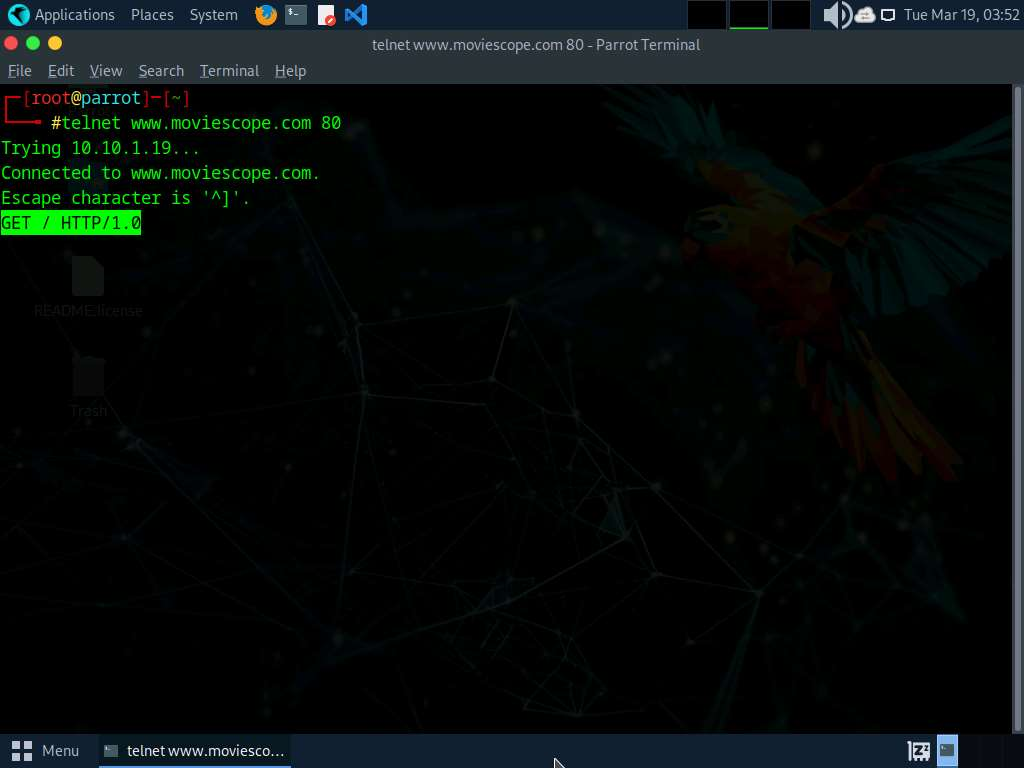
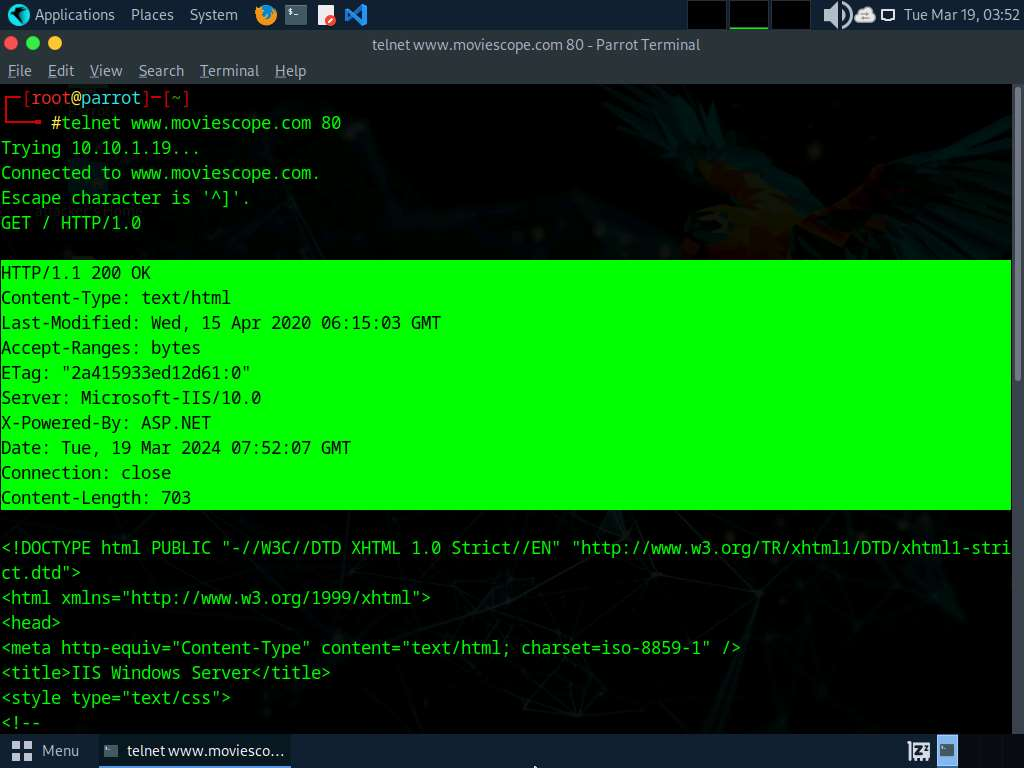
- In the terminal window, run command telnet www.moviescope.com 80 to establish a telnet connection with the target machine.


Task 2: Perform Web Spidering using OWASP ZAP
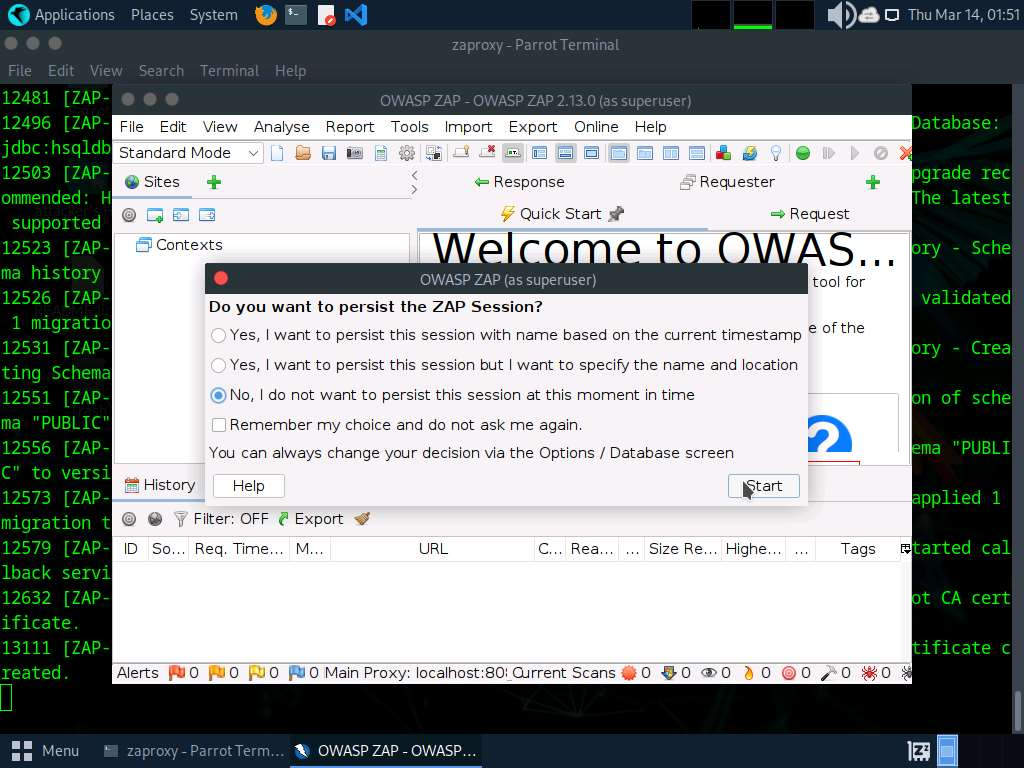
- In the Terminal window, type zaproxy and press Enter to launch OWASP ZAP.
- After completing initialization, a prompt that reads Do you want to persist the ZAP Session? appears; select the No, I do not want to persist this session at this moment in time radio button and click Start.
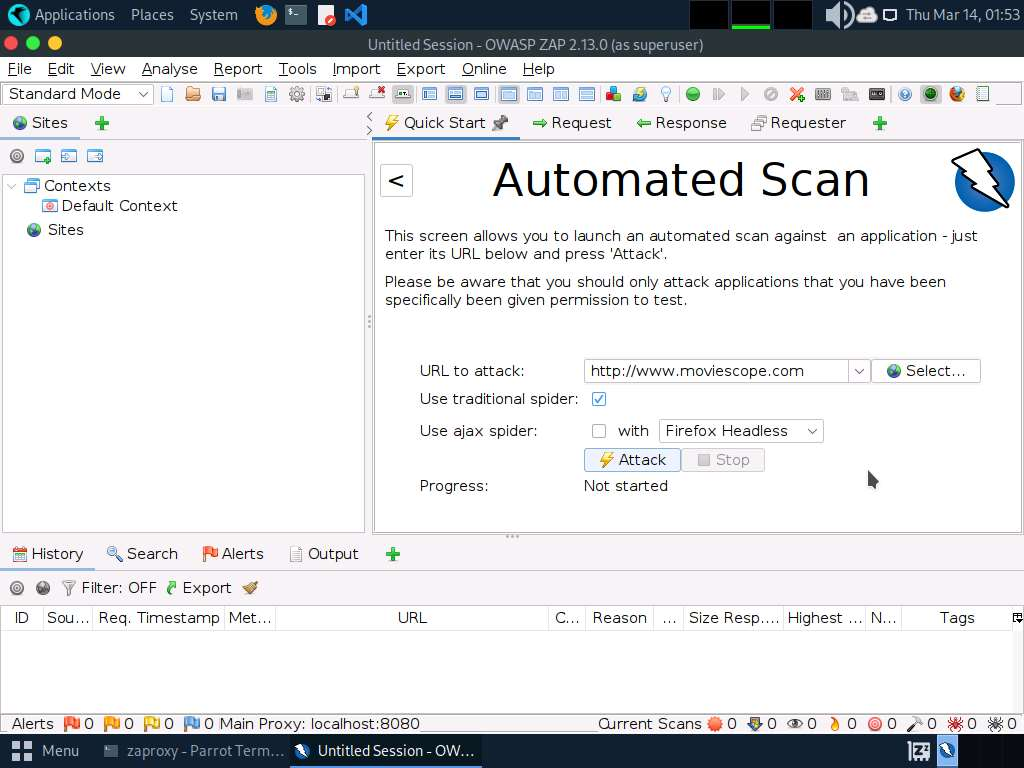
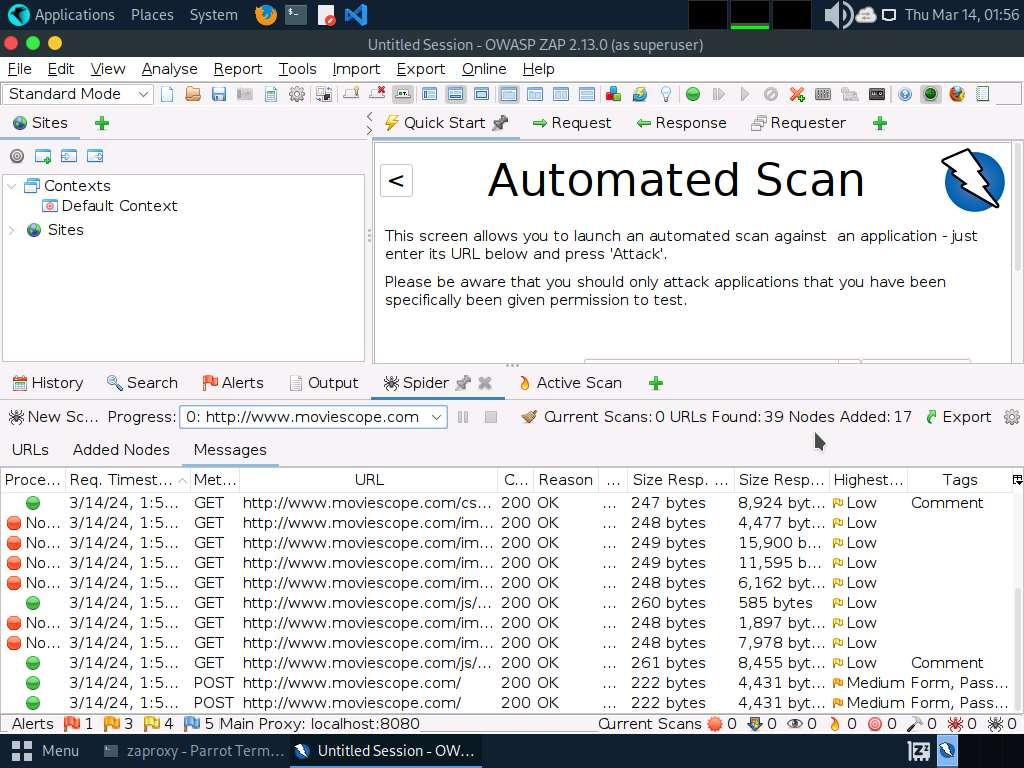
- The Automated Scan wizard appears; enter the target website under the URL to attack field (here, www.moviescope.com). Leave the other settings to default and click the Attack button.
- OWASP ZAP starts scanning the target website. You can observe various URLs under the Spider tab.
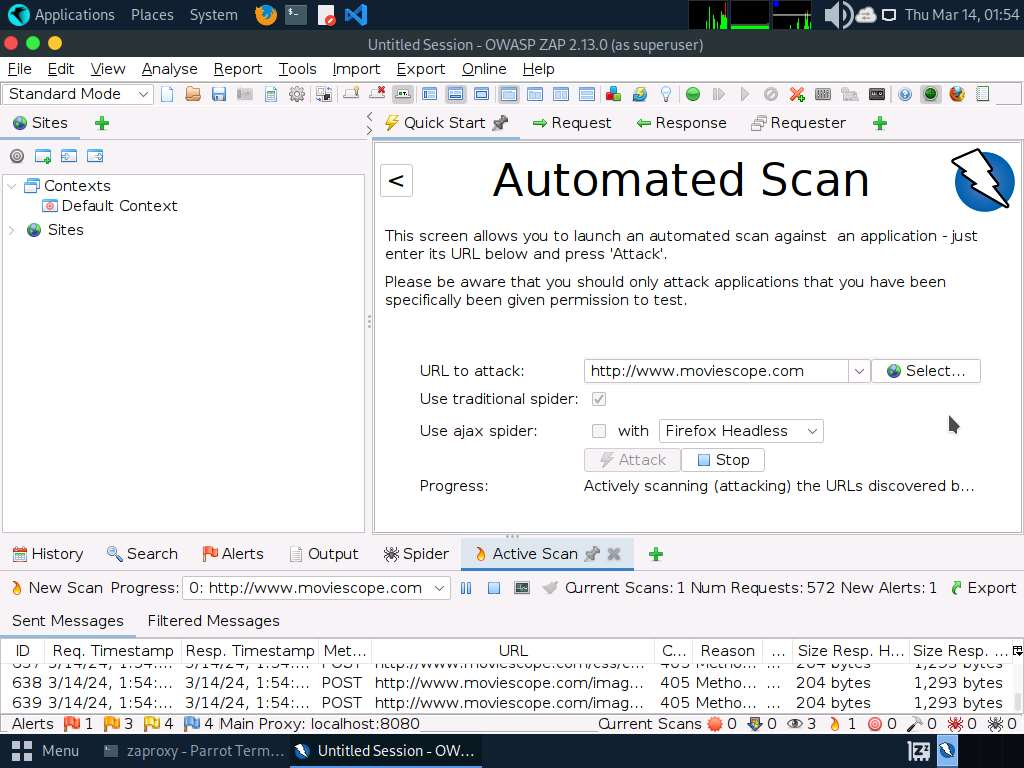
- After performing web spidering, OWASP ZAP performs active scanning. Navigate to the Active Scan tab to observe the various scanned links.
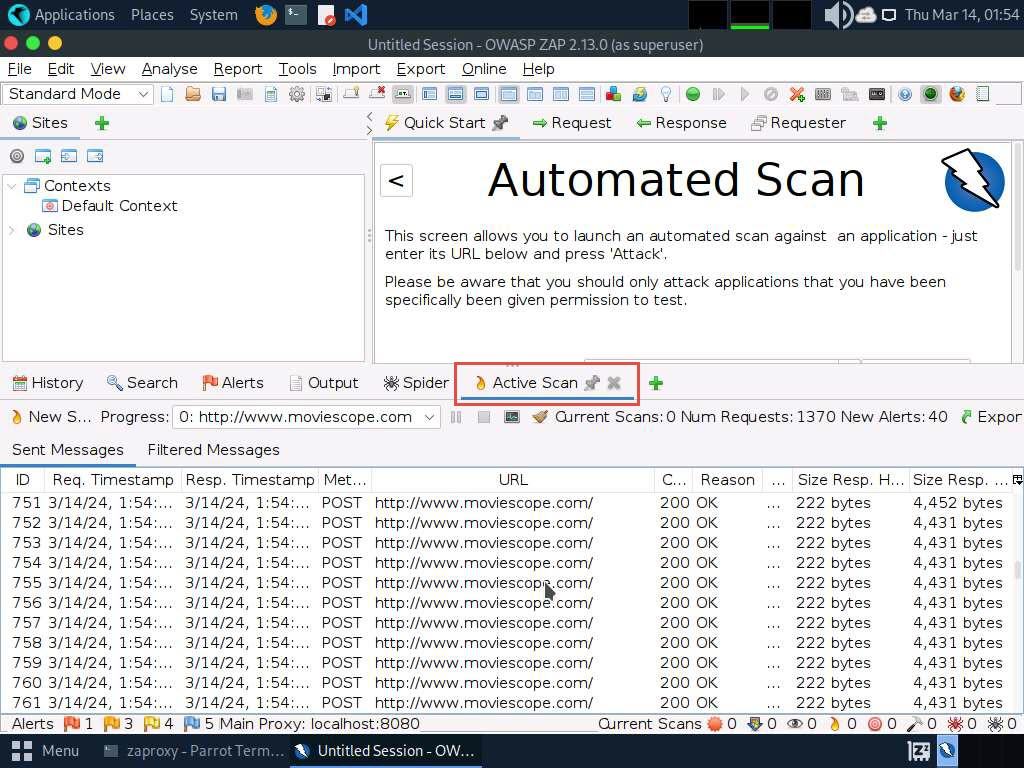
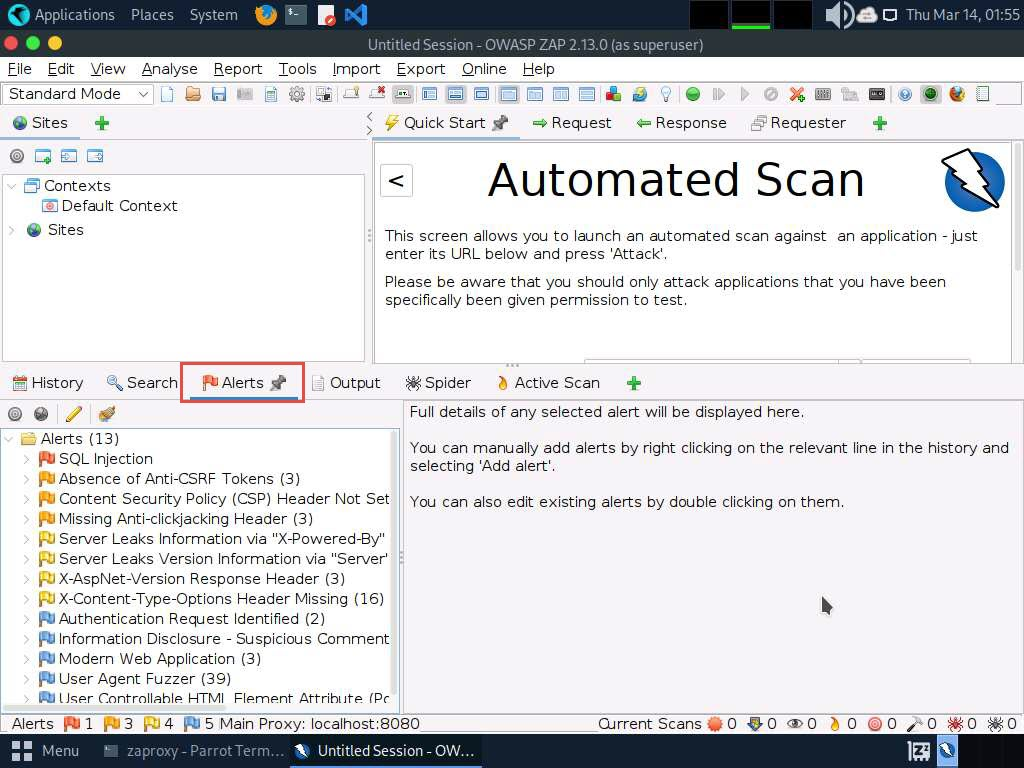
- After completing the active scan, the results appear under the Alerts tab, displaying the various vulnerabilities and issues associated with the target website, as shown in the screenshot.
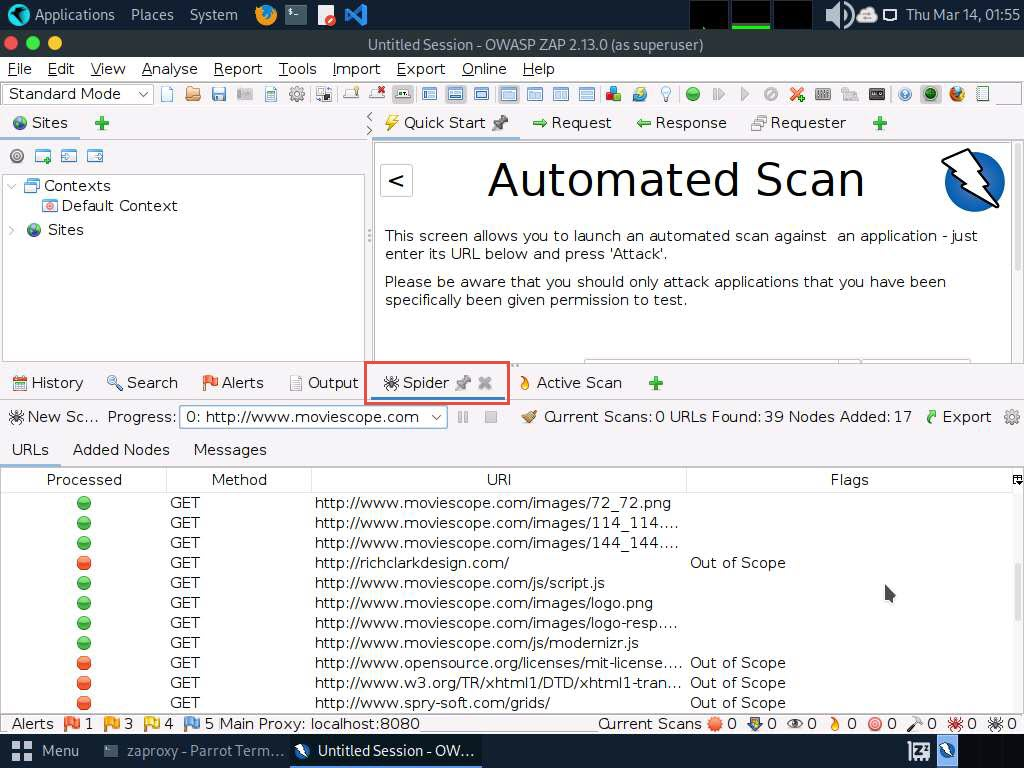
- Now, click on the Spider tab from the lower section of the window to view the web spidering information. By default, the URLs tab appears under the Spider tab.
- The URLs tab contains various links for hidden content and functionality associated with the target website (www.moviescope.com).
- Now, navigate to the Messages tab under the Spider tab to view more detailed information regarding the URLs obtained while performing the web spidering, as shown in the screenshot. In real-time, attackers perform web spidering or crawling to discover hidden content and functionality, which is not reachable from the main visible content, to exploit user privileges within the application. It also allows attackers to recover backup copies of live files, configuration and log files containing sensitive data, backup archives containing snapshots of files within the web root, and new functionality that is not linked to the main application.


Task 3: Perform Web Application Vulnerability Scanning using SmartScanner
- SmartScanner window appears. In the enter site address to scan field, enter www.moviescope.com and click scan button.
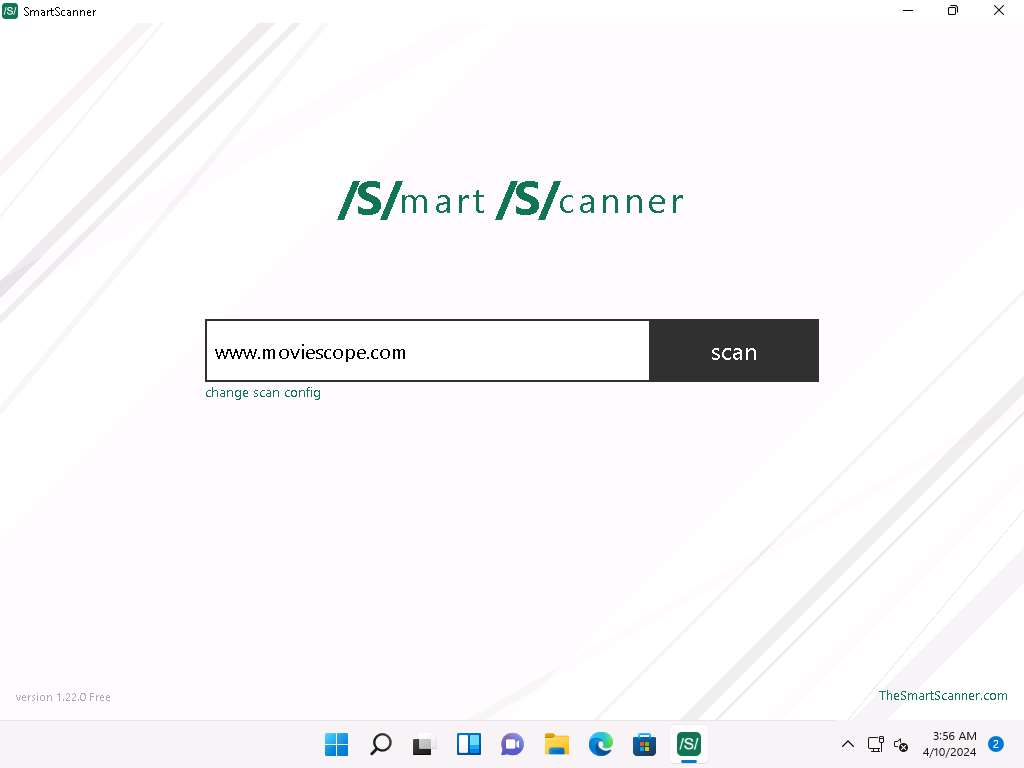
- The tool starts scanning the target website for vulnerabilities.
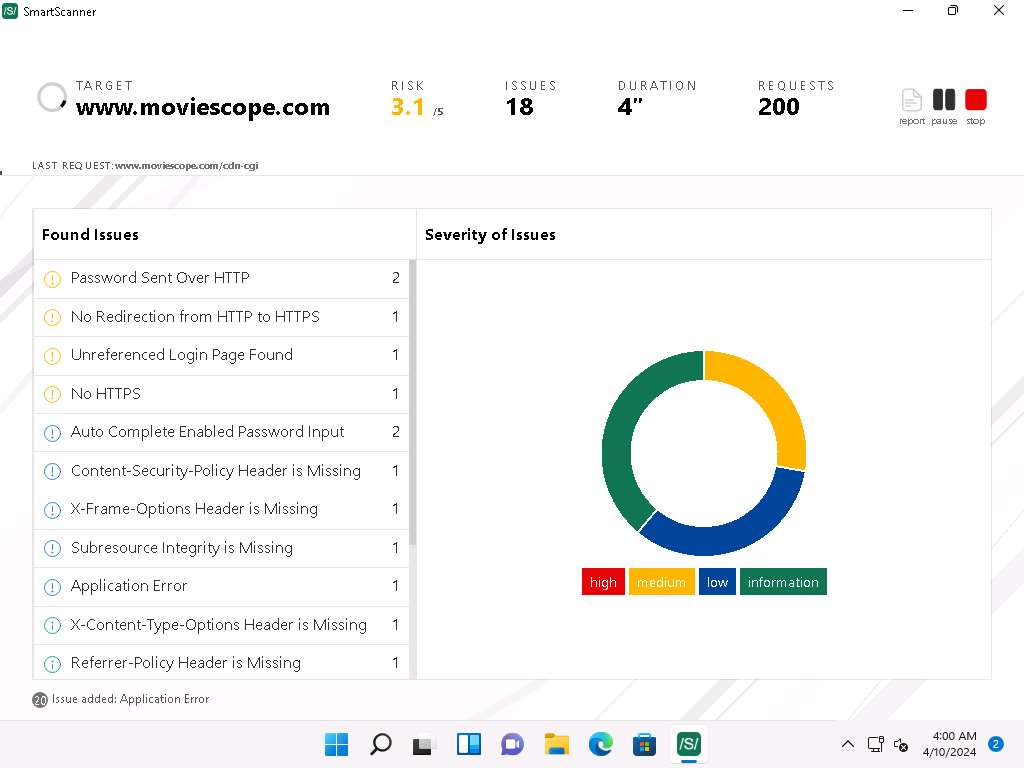
- Once the tool completes scanning, it will display the issues that are found under Found Issues section and Severity of Issues.

- Now, expand Password Sent Over HTTP and click on first http://www.moviescope.com link from the left pane to view the details of the vulnerability.
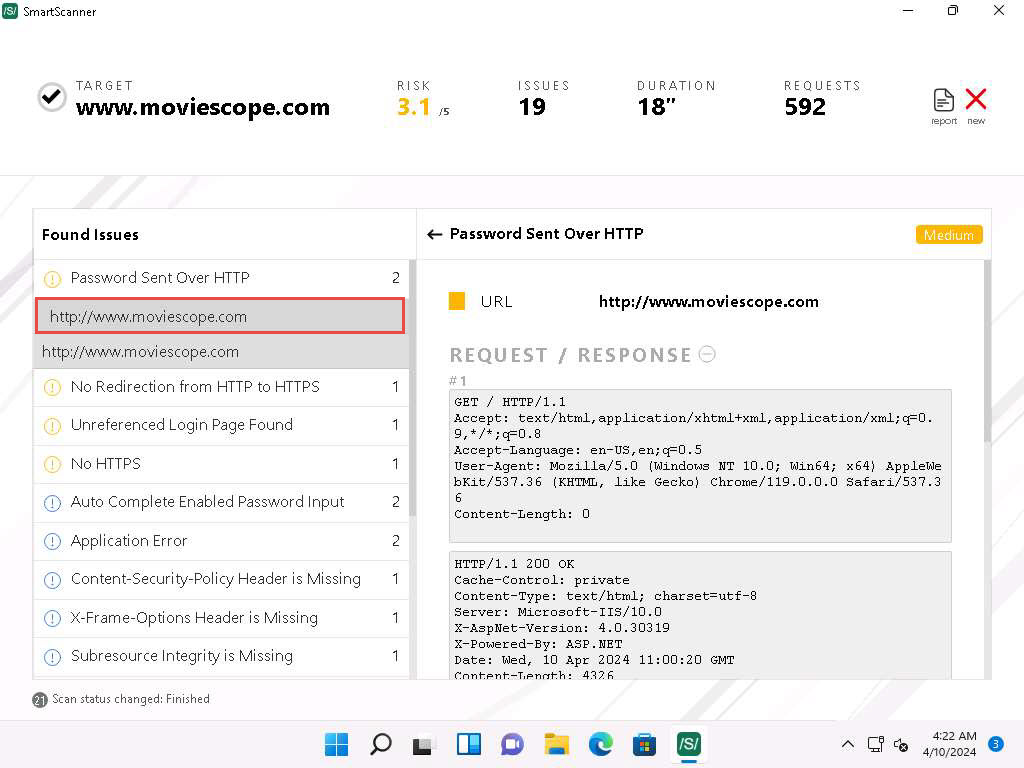
- In the right pane, scroll down to the DESCRIPTION part. We can observe that this website contains a vulnerability, which could be exploited by attackers to intercept sensitive information like passwords during transmission over unencrypted HTTP traffic.
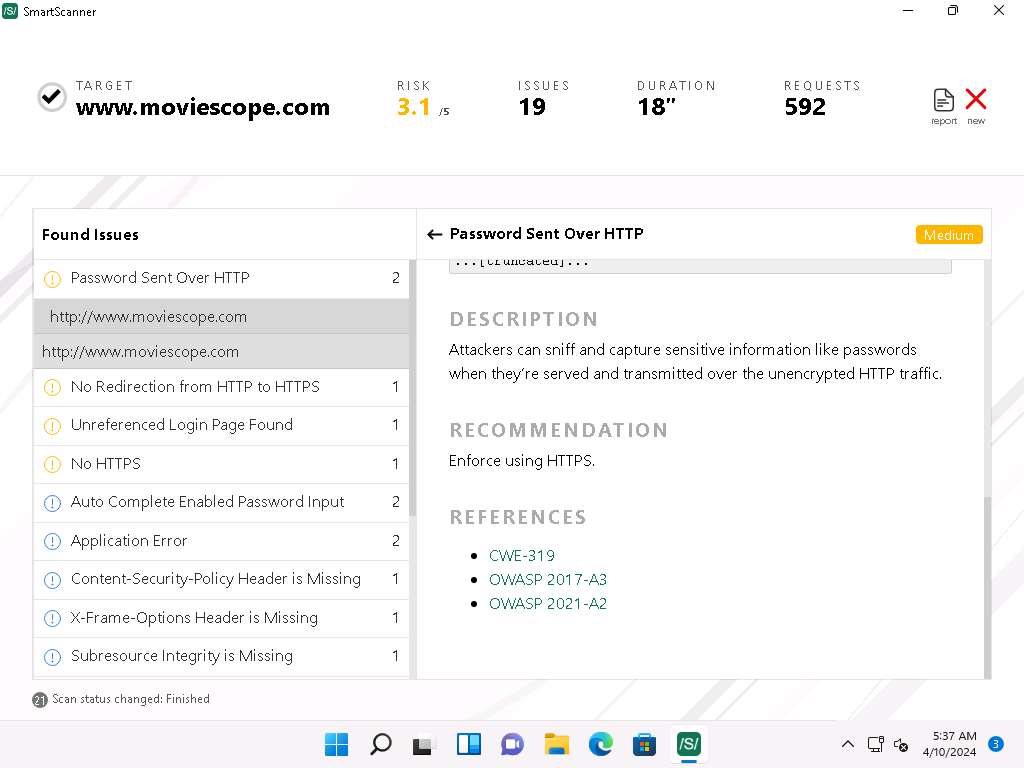
- You can also go through the RECOMMENDATION section to check for the recommended actions to patch the vulnerability.
- Now, under REFERENCES section, press Ctrl and click on CWE-319 hyperlink .
- A CWE website appears in Microsoft Edge web browser, displaying the details of CWE-319 ClearText Transmission of Sensitive Information.
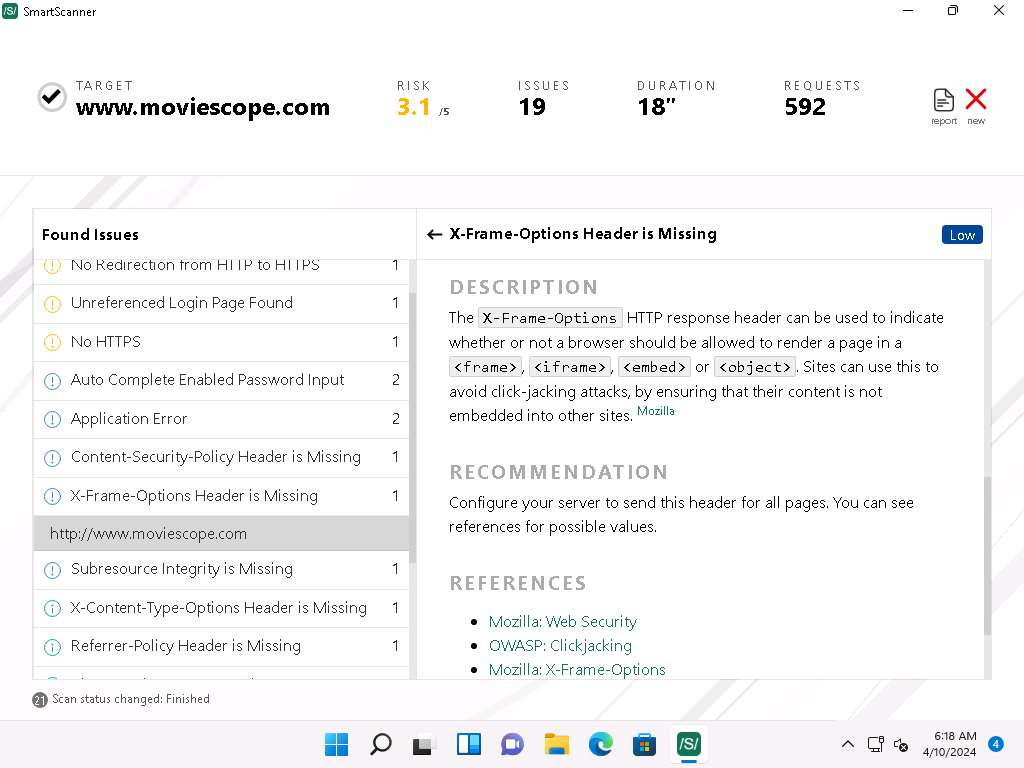
- Similarly, click the http://www.moviescope.com link available under X-Frame-Options Header is Missing node which is termed as Low severity.
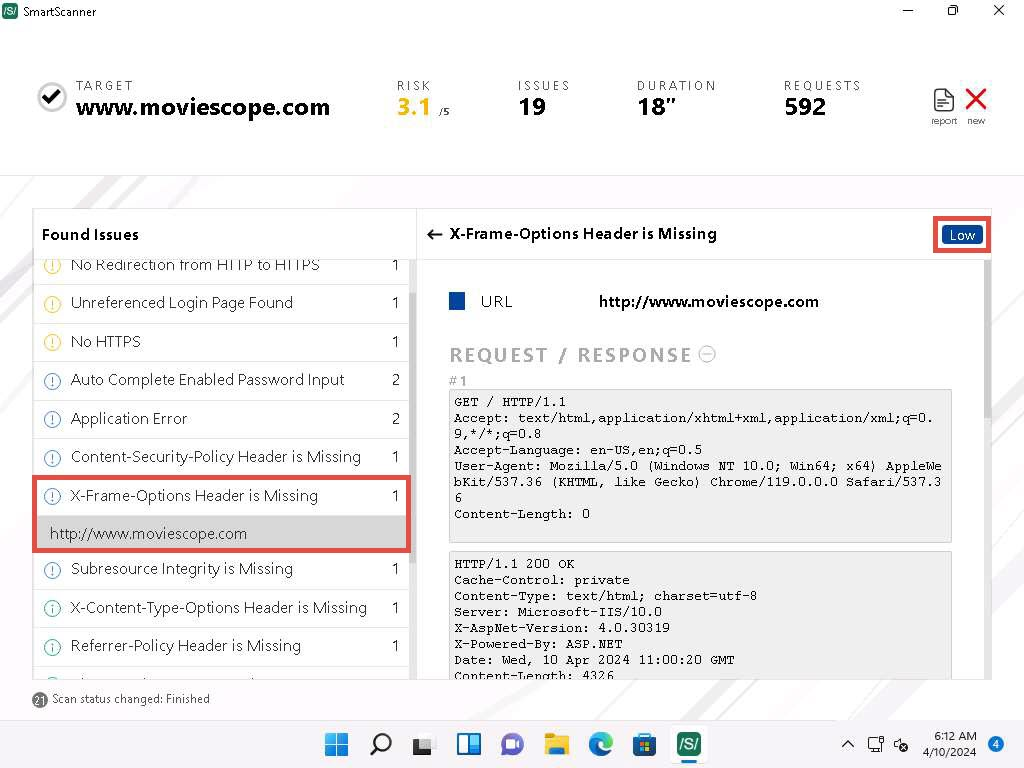
- Scroll down to the DESCRIPTION here, we can observe that the X-Frame-Options Header is Missing which will make this site vulnerable to click-jacking.
- Now, expand X-Content-Type-Options Header is Missing node and click on http://www.moviescope.com link to view its contents.
- Under DESCRIPTION section we can observe that the browsers can perform MIME sniffing which can cause the browsers to transform non-executable content into executable content.
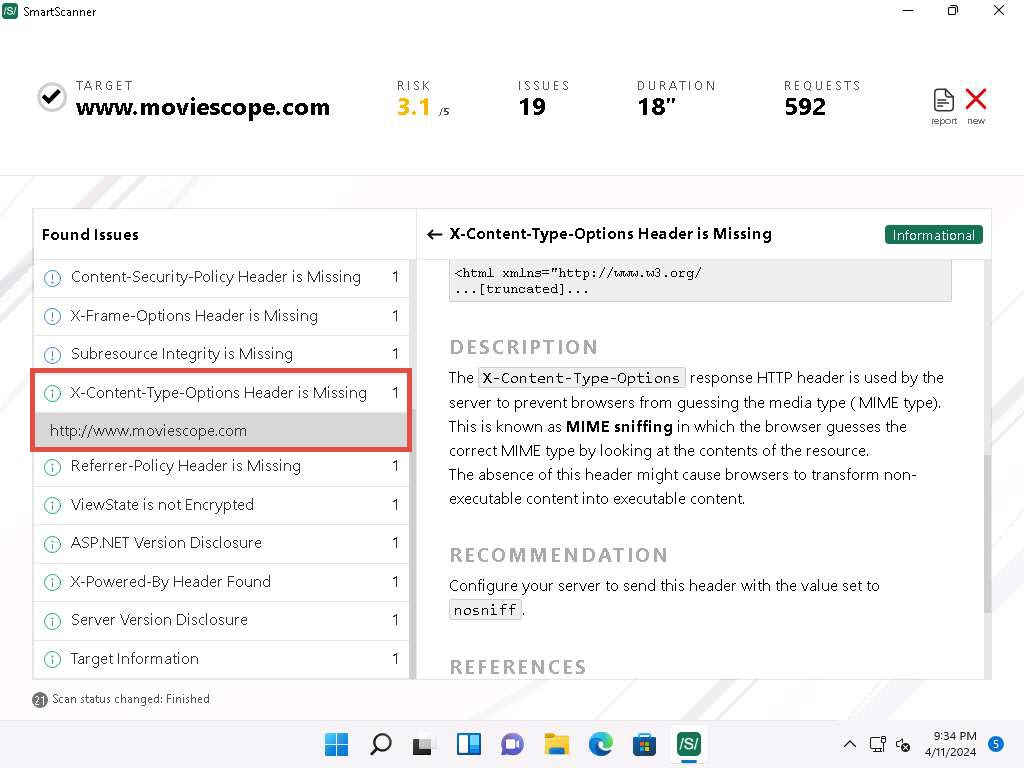
- Similarly, you can view the the RECOMMENDATION section and click on the reference link under REFERENCES section.
- You can also use other web application vulnerability scanning tools such as:
- WPScan Vulnerability Database (https://wpscan.com),
- Codename SCNR (https://ecsypno.com),
- AppSpider (https://www.rapid7.com),
- Uniscan (https://github.com),
- N-Stalker (https://www.nstalker.com).


Lab 2 Module 14: Perform Web Application Attacks
Task 1: Perform a Brute-force Attack using Burp Suite
- In this task, the target WordPress website (http://10.10.1.22:8080/CEH) is hosted by the victim machine, Windows Server 2022. Here, the host machine is the Parrot Security machine.
- Ensure that the Wampserver is running in Windows Server 2022 machine. To run the WampServer, execute the following steps:
- Now, click Type here to search field on the Desktop, search for wampserver64 in the search bar and select Wampserver64 from the results.
- Click the Show hidden icons icon, observe that the WampServer icon appears.
- Wait for this icon to turn green, which indicates that the WampServer is successfully running.
- Launch the Mozilla Firefox web browser and go to http://10.10.1.22:8080/CEH/wp-login.php?.
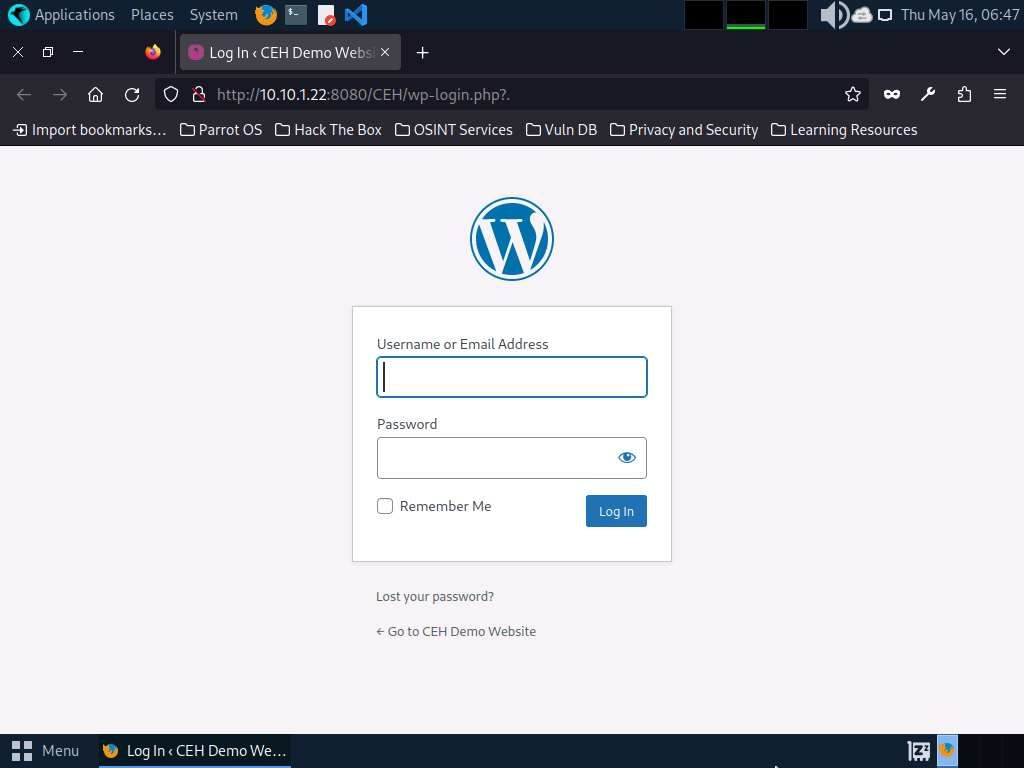
- Here, we will perform a brute-force attack on the designated WordPress website hosted by the Windows Server 2022 machine.
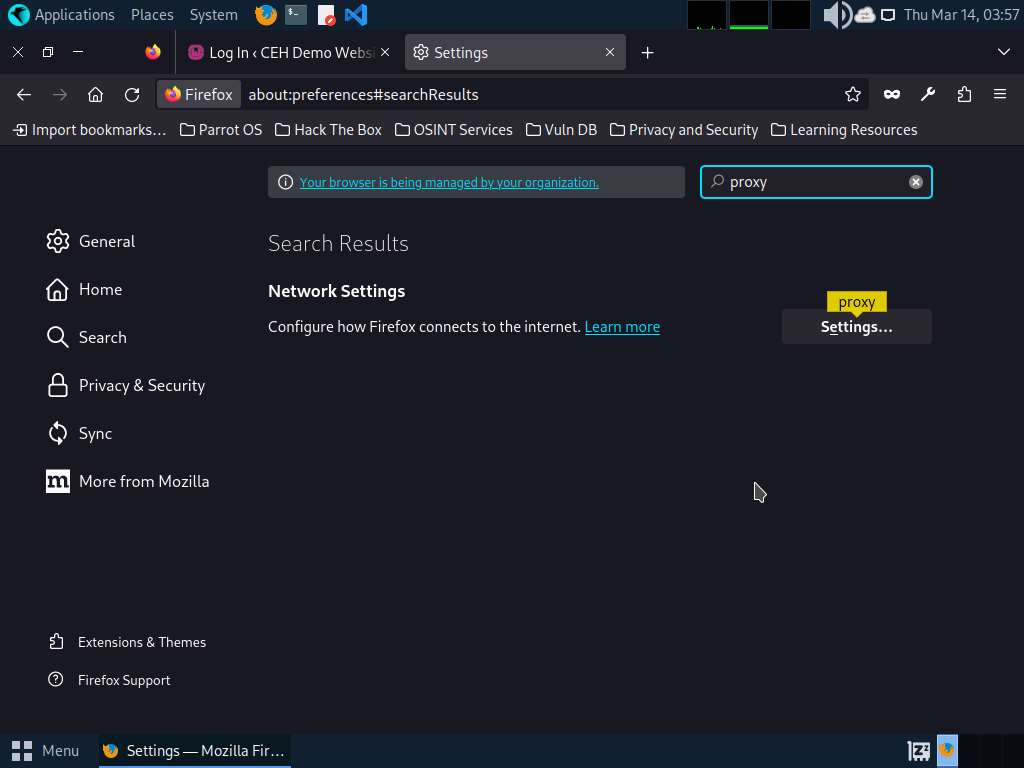
- Now, we shall set up a Burp Suite proxy by first configuring the proxy settings of the browser.In the Mozilla Firefox browser, click the Open application menu icon in the right corner of the menu bar and select Settings from the drop-down list. The General settings tab appears. In the Find in Settings search bar, search for proxy and in the Search Results, click the Settings button under the Network Settings option.
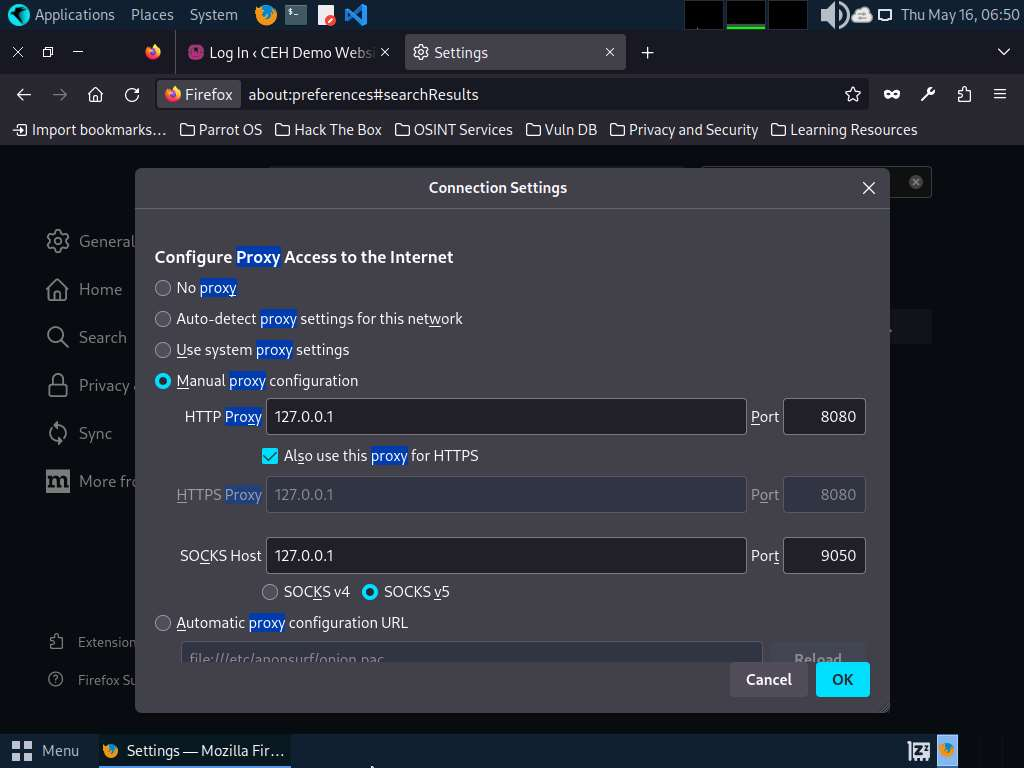
- The Connection Settings window appears; select the Manual proxy configuration radio button and specify the HTTP Proxy as 127.0.0.1 and the Port as 8080. Tick the Also use this proxy for HTTPS checkbox and click OK. Close the Settings tab and minimize the browser window.
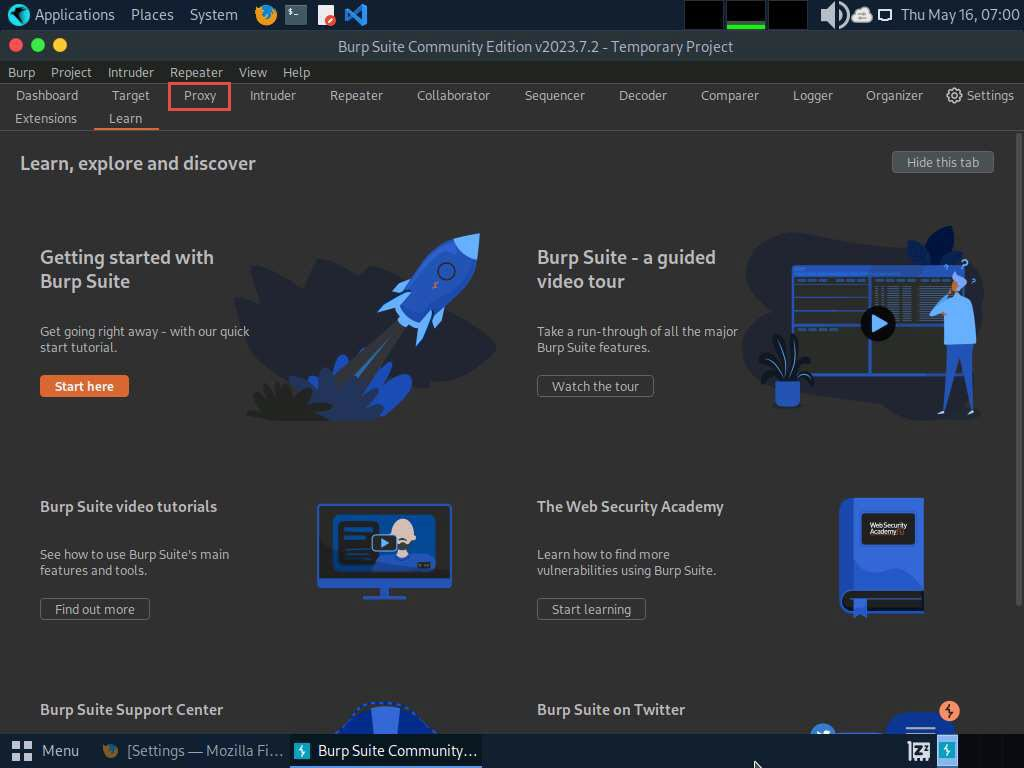
- Now, minimize the browser window, click the Applications menu form the top left corner of Desktop, and navigate to Pentesting –> Web Application Analysis –> Web Application Proxies –> Burpsuite CE to launch the Burpsuite CE application.
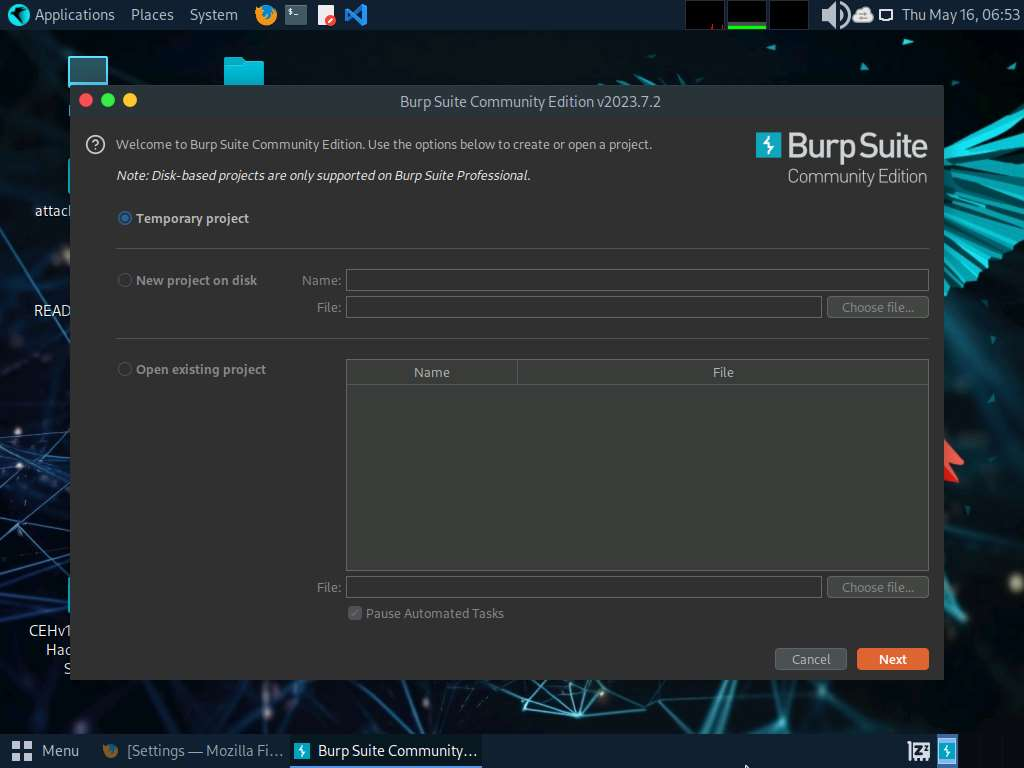
- In the next window, select the Use Burp defaults radio-button and click the Start Burp button.
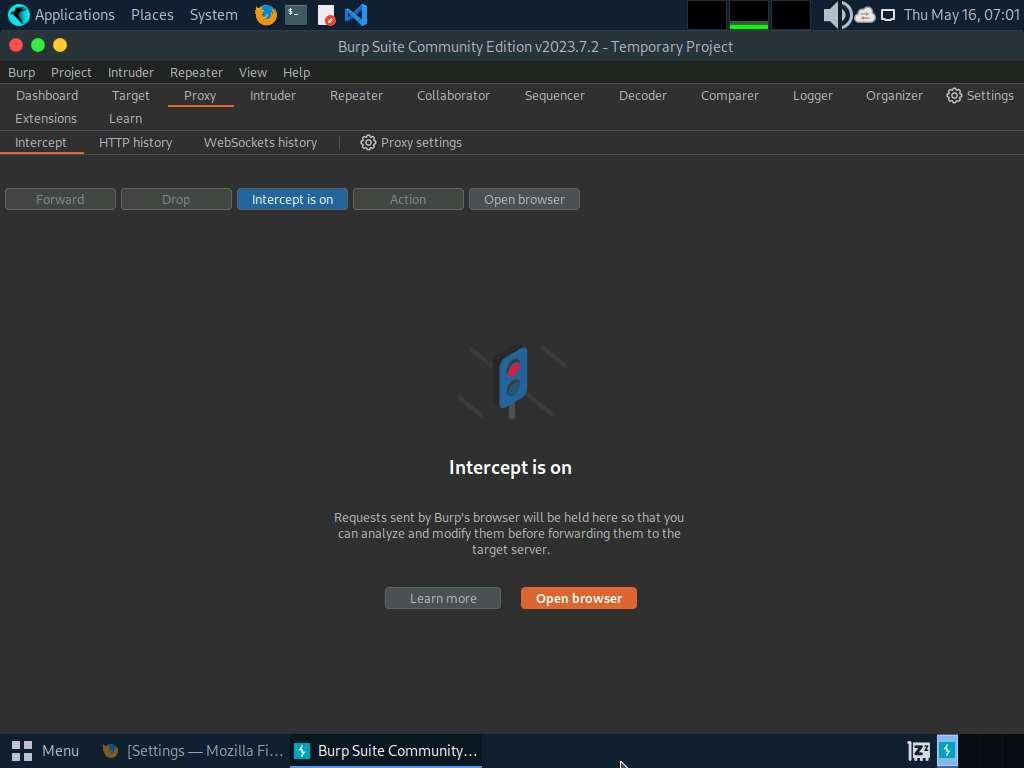
- The Burp Suite main window appears; click the Proxy tab from the available options in the top section of the window.
- In the Proxy settings, by default, the Intercept tab opens-up. Observe that by default, the interception is active as the button says Intercept is on. Leave it running.
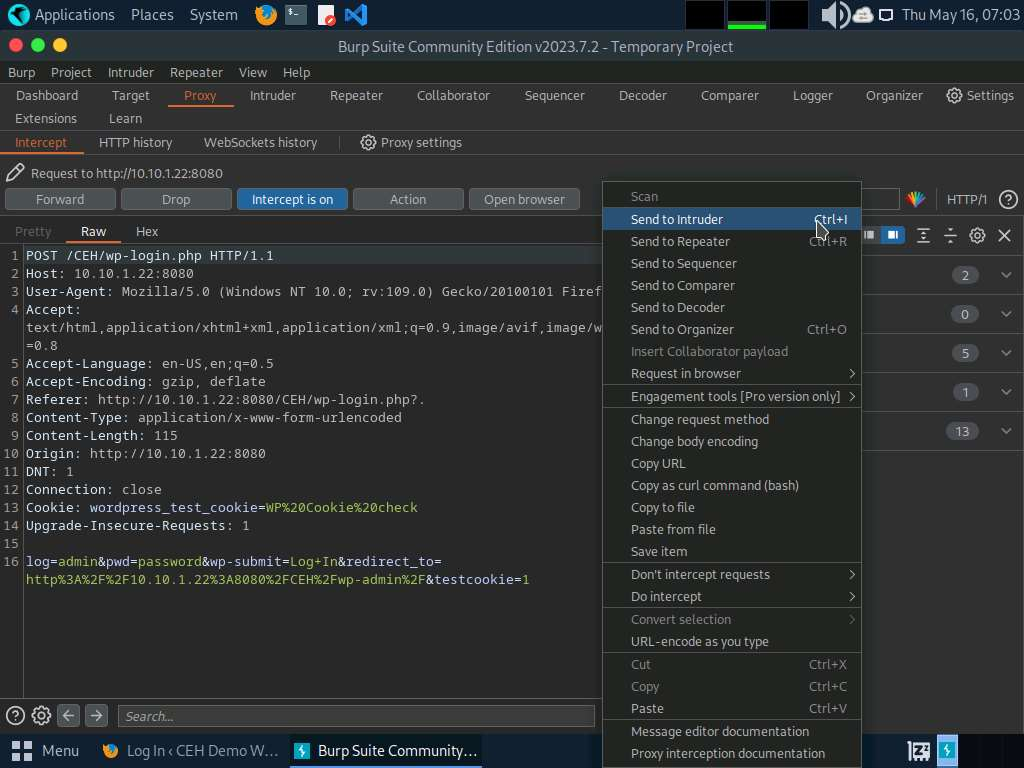
- Switch back to the browser window. On the login page of the target WordPress website, type random credentials, here admin and password. Click the Log In button.
- Switch back to the Burp Suite window; observe that the HTTP request was intercepted by the application.
- Now, right-click anywhere on the HTTP request window, and from the context menu, click Send to Intruder.
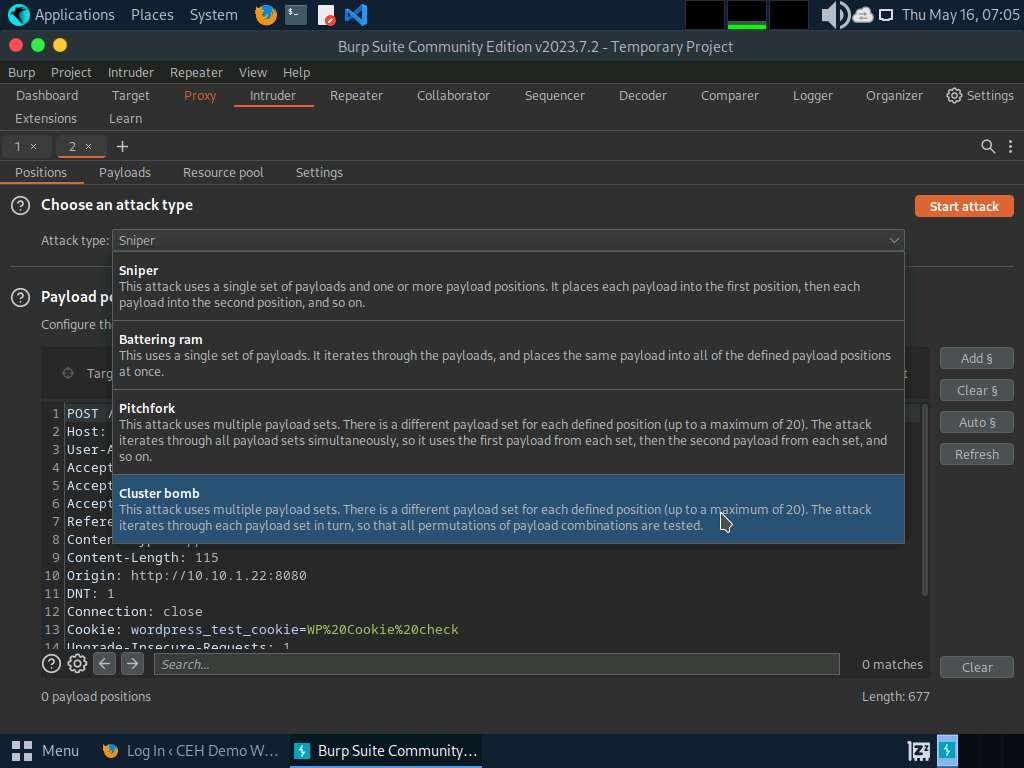
- Now, click on the Intruder tab from the toolbar and observe that under the Intruder tab, the Positions tab appears by default. In the Positions tab under the Intruder tab observe that Burp Suite sets the target positions by default, as shown in the HTTP request. Click the Clear § button from the right-pane to clear the default payload values.
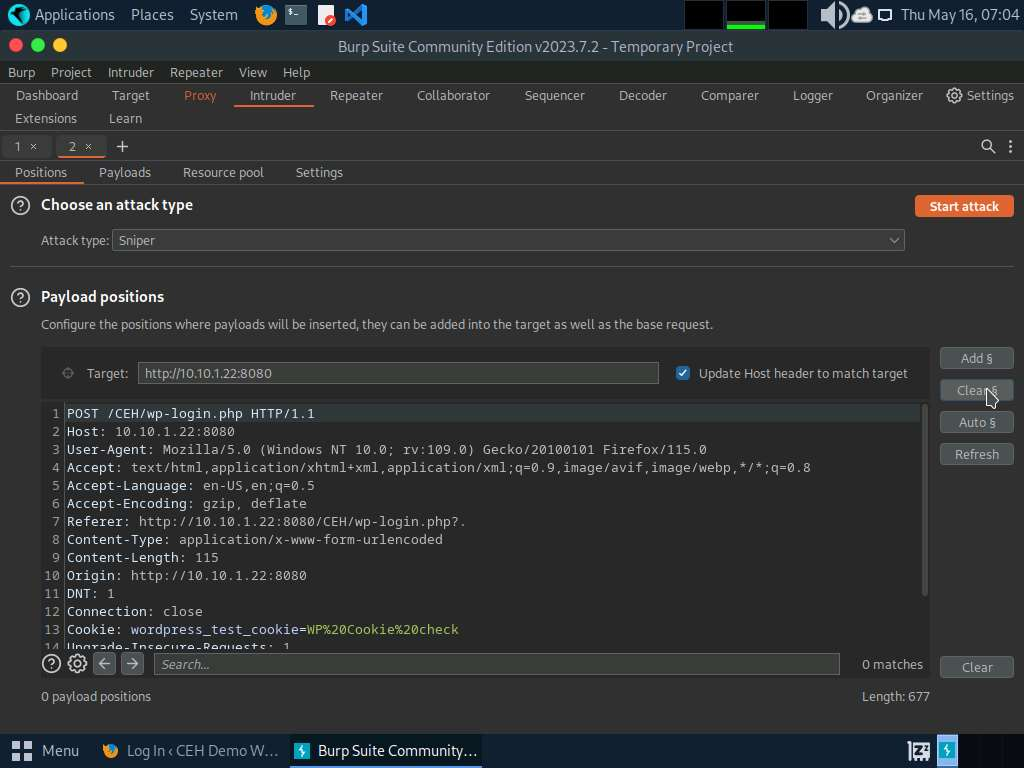
- Once you clear the default payload values, select Cluster bomb from the Attack type drop-down list. Cluster bomb uses multiple payload sets. There is a different payload set for each defined position (up to a maximum of 20). The attack iterates through each payload set in turn so that all permutations of payload combinations are tested. For example, if there are two payload positions, the attack will place the first payload from payload set 2 into position 2 and iterate through all payloads in payload set 1 in position 1; it will then place the second payload from payload set 2 into position 2 and iterate through all the payloads in payload set 1 in position 1.