Aquesta és una revisió antiga del document
1.6 Making life easier with the requests module
We have reached the point where we can start the final stage of our journey – we know enough to communicate with the web service using JSON as an information carrier. Unfortunately, our knowledge needs to be supplemented – we need a server serving a web service (sorry for all these serv…, we weren't able to avoid them) and we also need a tool simpler than the socket module to talk with the service (we beg your pardon).
“Wait,” you may ask here. “Doesn't the socket module already fit our needs?”
It does, but it’s too good. It's too choosy and too powerful. It exposes lots of details which aren't necessary available at the higher levels of software design. The socket module is perfect when you want to understand network issues at the TCP level and to learn which challenges the OS faces when it tries to establish, maintain, and close internet connections. This is why we used it before when we wanted you to enter the world of network communications, but at the same time, the socket is too bloated and too heavy when you just want to have a little chat with a web service.
Which of these demands (server or tool) should be satisfied earlier? The server, of course. We need our own, private HTTP server which will work only for us and successfully play the role of a RESTFul API foundation.
We’ve decided to use a free and open package named json-server, implemented on top of the Node.js environment. Node.js is – as Wikipedia claims – an open-source, cross-platform JavaScript run-time environment that executes JavaScript code outside of a browser. Don't be afraid – we’re going to encounter JavaScript again, but we aren't going to force you to write any code in it. It’ll act as a black box for us, and we don't want to persuade you to look inside it.
Okay. Let's start.
First of all, we need to have Node.js installed on our computer. The steps you should take depend on the OS you use. So…
- …if you're a Windows user, point your browser to https://nodejs.org/en/download, download and run the Windows installer (a file with a name that looks like
node-vxx.yy.z-x86.msi) from the LTS (Long Time Support) branch; accept all the default settings and let the installer do the job; after successful installation you should see an entry namedNode.jsin the Windows® start menu; - …if you're a macOS user, go to the address https://nodejs.org/en/download, download the
pkgfile and run the installer. Whole process looks the same as on Windows® - just accept all the default settings and let the installer do the job; - …if you're a Linux user, you have to go to the address https://nodejs.org/en/download/package-manager and obtain some more specific assistance; unfortunately, some Linuxes offer their own, native
Node.jspackages matching the specific system needs, and these packages can be installed using the built-in package manager, while others require manual installation; sorry, we can’t help you with this issue.
The next step is to open your OS console and…
- …if you're a Windows user, run the CMD.EXE program (as an ordinary user) and wait till a black (unless you've changed its color) rectangle appears on the screen;
- if you're a Linux or macOS user, start your favorite terminal emulator (note: administrative rights may be needed and your OS may require it –
sudois your friend).
The next steps will be almost the same in all the above platforms.
Node.js utilizes its own native tool for installing and updating components. Its name is the same under all the platforms covered, so when you issue the following command:
npm
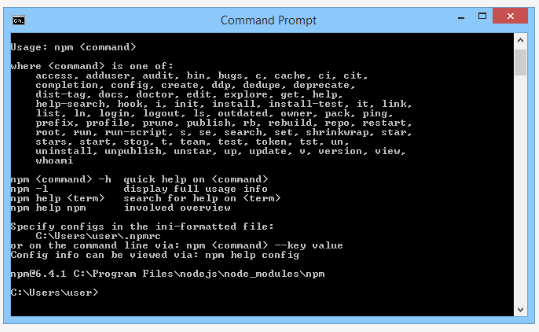
(which is short for node.js package manager) you should see a short help screen similar to the one presented here: 
