Aquesta és una revisió antiga del document
1.6 Events and how to handle them
Event handling
As you already know, events are the fuel which propel the application’s movements. All events come to the event manager, which is responsible for dispatching them to all the application components. This also means that some of the events may launch some of your callbacks, which makes you responsible for preparing the proper reactions to the user’s actions.
Now it’s time to show you some details of the events’ lives and anatomy. We’ll also show you how the events are able to influence a widget’s state, and how you control the event manager’s behavior.
For now, however, we want you to focus your attention on a very helpful method we’ll use to arrange communication between you and your application.
Of course, you can use the regular print() function to show messages and present a debug trace. The output will appear in the standard Python console, without affecting the application window. It’s okay if used in the early stages of development, but it’s very inelegant if you want the application to behave in a mature way.
The function we’ll use for our experiments is named showinfo(), it comes from the messagebox module, and it needs two arguments which are strings:
- output
messagebox.showinfo(title, info)
- the first string will be used by the function to title the message box which will appear on the screen; you can use an empty string, and the box will be untitled then;
- the second string is a message to display inside the box; the string can be of any length (but remember, the screen isn’t elastic and won’t stretch if you’re going to display a whole encyclopedia volume); note: you can use the
\ndigraph to visually break the info into separate lines.
We’ll ask the showinfo() function to show us its possibilities.
In the editor we've provided a very simple code demonstrating how showinfo() works:
import tkinter
from tkinter import messagebox


def clicked():
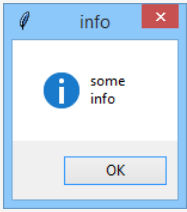
    messagebox.showinfo("info", "some\ninfo")


window = tkinter.Tk()
button_1 = tkinter.Button(window, text="Show info", command=clicked)
button_1.pack()
button_2 = tkinter.Button(window, text="Quit", command=window.destroy)
button_2.pack()
window.mainloop()
Note the \n embedded inside the info string.
And this is what the final message box looks like:
If your widget is a clickable one, you can connect a callback to it using its command property, while the property can be initially set by the constructor invocation.
We’ve already practiced this, so the snippet in the editor won’t be a surprise to you.
import tkinter as tk
from tkinter import messagebox


def click():
    tk.messagebox.showinfo("Click!","I love clicks!")


window = tk.Tk()
label = tk.Label(window, text="Label")
label.pack()

button = tk.Button(window, text="Button", command=click)
button.pack(fill=tk.X)

frame = tk.Frame(window, height=30, width=100, bg="#55BF40")
frame.pack();

window.mainloop()
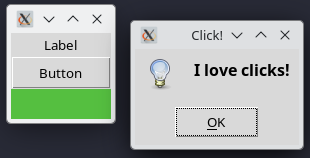
Note – there are three widgets in all, but only one of them (the Button) is clickable by nature. Such a widget’s constructor is equipped with the command parameter, which is used to bind a callback.
The window along with its message box looks like this:

